Monday, August 12, 2013

DIY Crafts in Spain

Pin It Now!

Pardon the dust, but I spent six weeks in Spain the beginning of this summer walking the Camino de Santiago de Compostela.  Just as an FYI, Santiago means Saint James, so this pilgrimage is literally called The Way of Saint James.  You can look it up for more history if you want.
I walked with my friend Sarah who spoke excellent Spanish since she had been living there for two years.  It took us 33 days to go nearly 500 miles and it was a mentally and physically challenging, yet an extremely wonderful experience.

Here are some of the reuse diy crafts I came upon along The Way.
First, during the summer of 2012, Sarah spent the summer at home and she made a backpack rain cover with fused plastic bags.  Here's the result.  I think it's super cool:


In Pamplona, which is a pretty neat city, we came upon this decorated bicycle:

photo by Sarah
Along The Way we came upon these flags that stated how much garbage a person creates in a day, super cool:

1.3 kgs of garbage a day
One of the hospitalarios showed us all of his artwork, which was pretty amazing, but I also noticed he was wearing this sweet fanny pack.  It turned out he made it in '89, wow, original hipster!


Paco lived in France for a while.

Paco and Sarah goofing off.
We also saw some very cool and interesting iron work done on somebody's fence for their house:


three iron work photos by Sarah
We stayed at an albergue that had a lot of artwork done by the hospitalarios and they had a very interesting way to decorate their hanging pots:


They also used a some really cool large old cans for planters, which I really liked, but did not take a photo of.

There were many crosses along The Way, but this one was exceptionally cool and somebody had made a peregrino (pilgrim) sculpture, which was kind of funny.


photo by Sarah

photo by Sarah
We were on a hill leaving a pueblo when we spotted a map of the world in the distance.  I have no idea what it was made out of, maybe rocks? maybe bushes?

photo by Sarah
I would like to mention that there's a very DIY Spanish method to lancing blisters on your feet by threading thread into them and leaving it there so you can "floss" your blister a few times a day.  That way the blister doesn't refill with fluid while you are walking and it's much more comfortable.  Of course, you want to make sure to sterilize everything with iodine and then use an antibacterial while flossing the blister.  I was blister free until week three when I had to do this.  I took a photo of it, but I will spare you even though I find it fascinating.

So we made it to Santiago.  Here's a photo of us as we arrived at the Santiago Cathedral:
We spent a night in Santiago, went to the Pilgrim's Mass where we saw a 175 pound incensario swing above our heads, super cool.  It was meant to fumigate the flea ridden pilgrims of yore.  We then caught the bus to Finisterre because we didn't have time to walk.  Finisterre means the end of the earth, which it was to the Spanish before Columbus set sail.  
I also learned that this pilgrimage was pre-Christian.  The pagans use to make a pilgrimage to the Atlantic, jump in and burn their clothes and they were born again.  That's just what I did.  We spent the day on this gorgeous wild beach and I jumped in the Atlantic.  That night we walked up to the lighthouse, watched the sunset where I burnt my hat and Sarah burnt her boots because they were done for:


0 kms to go
We had a great time.  We saw a lot of amazing things, but you are definitely getting a different, very diy view of the Camino.  I hope you enjoyed it~ 
Buen Camino

Thursday, June 6, 2013

1960s Wallpaper Light Switch Covers

Pin It Now!

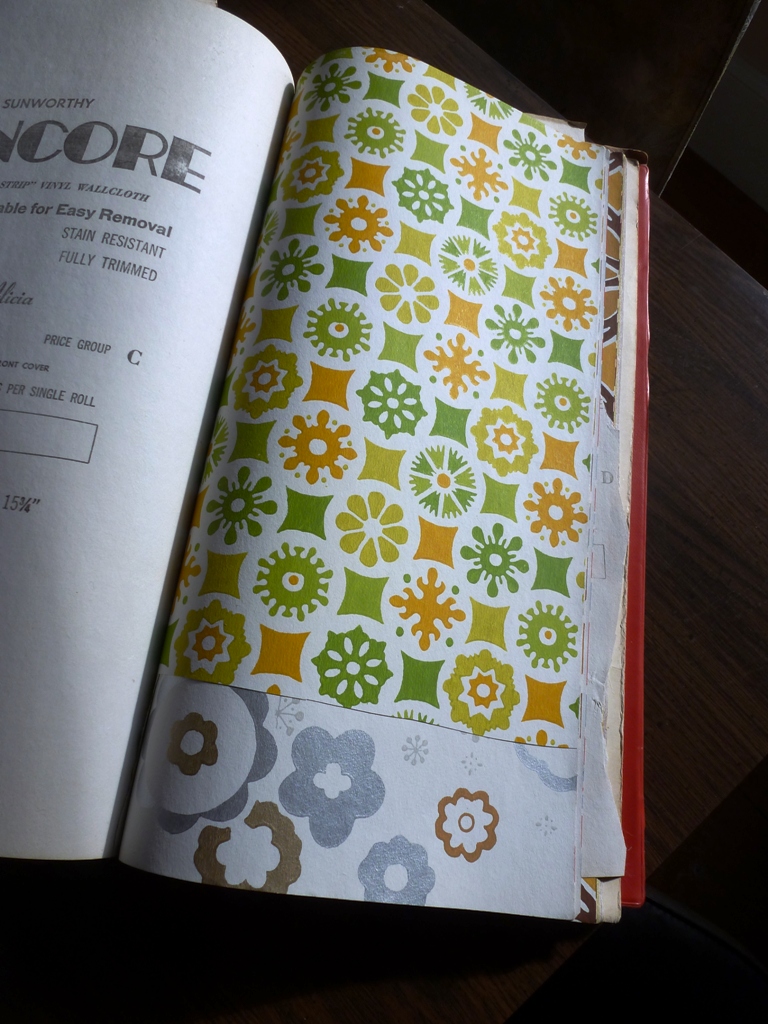
Yes, I do make a lot of light switch covers, but they are a hot seller at SCRAP's ReBoutique.  Brandon recently went to Chicago for his mom's 70th birthday and came across these two wallpaper books in her attic and he brought them home to me.  The are amazing!  I really love the 1960s patterns.  The Patrician ones will be handing, too, and I will probably embellish them a bit since that's my style.

Enjoy~


Oh, and I am off to Spain tomorrow to walk the Camino de Santiago, so you won't see another post from me till the end of July.  Have a nice summer!

Sunday, May 19, 2013

SE 46th and Woodstock Red Fox Vintage

Pin It Now!

As some of you may know I have been a vintage vendor at House of Vintage for the past 2 years, which I really enjoyed.  However, I heard through the grapevine a couple months ago that Red Fox Vintage was opening up another location and so I pounced and reserved a really nice spot at their second store, which is on SE 46th and Woodstock.

My partner, Brandon, was going to make me this super cool clothing rack for my new spot.  It turned out that we had one weekend to get it made and one evening to get everything set up.  Whew, we are both glad that is done.  Here are a couple of pics:


Brandon looking a bit disheveled. 

My amazing new clothing rack, so efficient!


Ready for business!
Red Fox opened this Saturday and it's been really busy; Hooray!  I am really pleased with how everything turned out.  I couldn't have done it without Brandon.  He put up the shelves and my Fascinate Me sign (the name of my shop).

There's going to be a super awesome grand opening June 1st.  I will keep you posted with details.

Sunday, April 28, 2013

2013 Filmed By Bike Raffilista

Pin It Now!

Last weekend I was a raffilista for Filmed by Bike.  I think this was my fourth year as a raffilista.  FBB has been going on for 11 years; wow!

I found this amazing black and silver skirt and I have this sweet belt that was perfect for holding money and tix!  I also found this amazing hat at an estate sale the day before. 


My lovely wing girl, Erin, went for the Like a Virgin look and I have to say she pulled it off!!!  She looks amazing.  I had her put her leg on the bike tire because those shoes are amazing.

 Filmed by Bike was  a huge success as always.  We sold a ton of tix and the film shorts were great!

Thank you, Filmed by Bike (and the arm warmers I am wearing are from Sock Dreams and they are fabulous.)

Sunday, April 7, 2013

Marbling Fun Part 2

Pin It Now!

Last weekend when Portland was experiencing such beautiful weather, Keri Piehl and myself got together for another round of marbling.  Now that I knew what images marbled well, I wanted another shot at it.

It was a beautiful day so we were out in the driveway enjoying the sunshine and a bit of wind, which made for some interesting natural marbling at times.  The wind eventually died down and it was just lovely.

I remembered my camera this time so I took photos during the various stages of the marbling process.  Here is a picture of the marbling setup.  These were inks that Keri had procured from a free box, which piqued her interest in marbling in the first place.  Since she then she had bought better quality inks from SCRAP and we realized these were not as good:


If you click on my Free Box the Magazine blog, you can see the saga of these inks.
As you may notice Keri made her own combs with rulers or frame pieces and attached straight pins to them.

First, you need to decide what you want to marble and the sky is pretty much the limit.

Second, you need to prep your paper with an agar solution so that the ink doesn't slide off the paper when you rinse it off.  Some inks and paper don't need this prepping, but I can't tell you anymore about that.

Keri prepping her papers.

Before shot of a 1958 newspaper ad I am planning to marble.

Another 1958 ad, I am really into vintage images.
Next you drop in the colors you want to use into some sort of seaweed solution.  This is what the ink settles on and what you use for marbling.  Since I use all of Keri's materials, I don't really have any details on this.  If you want more info, I am sure there are plenty of internet tutorials for you and, of course, lots of books.  I'm just giving you a general sketch.


I am going to make a flower pattern in this one.
After the you have a good amount of ink on the seaweed solution, you then run your combs through.  This is what "marbles" the paper or whatever you are marbling.  You can experiment with various styles and designs.

You then lay the paper on top and tap it a bit to get any air bubbles out.  You slide the paper off along one end and you then rinse the paper to pull off any ink.

After that you hang it up to dry.  We used a clothes or sock drier for this purpose.

When it is dry, you are done and you have some beautiful marbled paper for wrapping or display, envelope making, whatever you want.


I also did some smaller ones for covering light switch plates.

These were really cool.  They came from a book that was falling apart that I found in a free box.  I love the images of the various chess moves.  I am going to use them for light switch covers as well.  More info and images of the book on my free box blog.

Happy Marbling!

Friday, March 29, 2013

Zora's 3rd Birthday!!!

Pin It Now!

My good friends who live in Boston have an adorable daughter named Zora.  I actually haven't seen her since she was one, so I doubt she would know who I am, but I have seen videos of her and she is very cute. 

I sent her a couple of presents this year.  One was a laurel or fairy crown that I found pre-made in the floral section at SCRAP ~ score!  The other item is this adorable vintage hanky apron that I found at an estate sale, however, it is handmade and it seems pretty simple to make.  I do think she will have to grow into it, though.

Zora opened her present today since it is her birthday and her Mom recorded it and sent it to me.  I thought it was so cute that I would send it out to the rest of the world.

http://youtu.be/X9-Gr-MEsQg


Wednesday, March 20, 2013

Happy Vernal Equinox!

Pin It Now!

I was leaving yoga today and Lisa Mae, the owner of the studio, told me about this image she had seen on the internet about a farmer who was denied the right to build a barn for some reason for his horses, so he built this super awesome structure instead.  Apparently there were no laws against building a giant table and chairs.

This conversation came up because I was talking about various upcycle crafts, namely the clip-on earring magnets that I recently made, and she happened to think of this.

I was laughing so hard when I heard the story, party because it just sounded awesome and partly because it instantly reminded me of a dream I had last night where the neighbor had made and installed these three giant (as tall as the trees) black bulls with accents of red glitter on that little strip between the sidewalk and street.  In my dream I had thought they were really cool.  What a strange world :)  I love it.

I did a little research on this installation and I would like to mention that the table and chairs not only provided shade for the horses, but was used to advertise the farmer's business.  Here are a couple of quotes I found.

Three horses try to hide from the rain under an oversized table and chair in a pasture near Doellstaedt, eastern Germany. The huge garden furniture was installed by a local wood merchant to promote his products.

Horses stand in the shadows of a gigantic table and two chairs during heavy summer heat in Doellstaedt near Erfurt, eastern Germany, on Friday, July 6, 2004. Wood dealer Jens Braun built the unusual furniture as a protection for his horses.

Anyway, I hope this inspires you to seize the spring and do something creative!!!

Related Posts Plugin for WordPress, Blogger...