Pin It Now!
Yesterday was amazing! I went to the DIY Fair at the Imago Dei church. It was super cool. It was about 20 to 25 tables that showed you how to make a gift for the holidays. I was in heaven.
At each of the tables they had printed out tutorials that you could take home with you. I grabbed quite a lot and so I will share some of the ideas and crafts in a few blog posts.
The first craft I would like to share with you is handmade wrapping paper.
The next craft is cookie boxes or gift boxes:
There was also this cool table next to the cookie boxes that made silhouette pictures.
Next up is handmade envelopes:
There was also a band playing...so fun.
And last, but not least for this post are Holiday Cards:
There was a table where kids were making holiday cards.
I went with my friend, Gabby.
And finally, there was an adorable dog.
I hope this inspires you to have your own DIY Christmas, and don't worry, there's more to come!
Sunday, November 24, 2013
Tuesday, November 19, 2013
Thanksgiving Centerpiece on the Cheap
Pin It Now!
Everyone has been posting their favorite Thanksgiving decor ideas and so I thought I would join in on the fun. Actually I love to make flower arrangements using Rosemary. Now rosemary is pretty ubiquitous in Portland, Oregon. It's hard to walk down a street and not see a hardy rosemary bush growing from which you can more than likely procure a few stalks and be on your way, so it makes for a very cheap resource.
Imagine my delight on Saturday when I came home to find my neighbor was cutting back her plants for the winter and there was tons of rosemary and marigolds and golden oregano and regular oregano and fennel just lying there on the sidewalk waiting to be composted. I grabbed up an armful of various plants and headed home.
Here's the outcome.
As you all know I have been merrily making terrariums for the past couple of months, so I would like to add that a terrarium perhaps decorated with some fall themed figurines or objects would make the perfect centerpiece as well.
Here's my latest terrariums. They are not fall themed and I am up to 10 terrariums now. I bet everyone knows what they are getting for Christmas!
Thursday, November 14, 2013
Matchbox Shrine Crafternoon
Pin It Now!
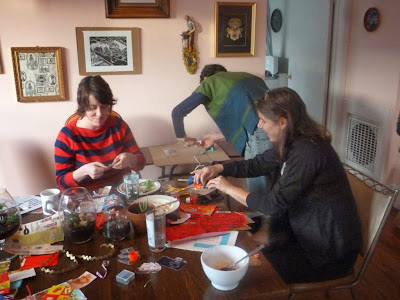
This past Sunday I hosted a matchbox shrine making party, which felt great. I haven't hosted a craft day in quite a while. It was long overdue. Myself and five other lovely ladies attended and we all dived wholeheartedly into making our shrines. It was wonderful. Here are some of the results.
Cory made two amazing shrines. They are very different from each other, but I love them both:
Meghan made an adorable shrine for her twin nieces. I can't remember their names, but their initials are E and F.
I love the winter theme.
Judy made a larger box. Her daughter will be graduating from High School this year, so this is a shrine dedicated to her. Judy said she will continue to add to this shrine throughout the year.
Gabby made two amazing and adorable shrines.
I love it.
Carye made a simple and adorable shrine of an elephant that she is going to give to her sweetie.
And I made three shrines that will become a larger project involving a large diorama or shrine dedicated to my walk across Spain this past summer, aka the Camino de Santiago de Compostela, which I met Judy on by the way, and it turned out she only lives approximately 10 blocks away from me. I had not met her before the Camino I should add.
This past Sunday I hosted a matchbox shrine making party, which felt great. I haven't hosted a craft day in quite a while. It was long overdue. Myself and five other lovely ladies attended and we all dived wholeheartedly into making our shrines. It was wonderful. Here are some of the results.
Cory made two amazing shrines. They are very different from each other, but I love them both:
 |
| This one is entitled: the Key to my Qi |
 |
| There's a rusty bullet on the bottom of this one that I collected the day before. |
Meghan made an adorable shrine for her twin nieces. I can't remember their names, but their initials are E and F.
I love the winter theme.
 |
| Judy and Meghan working hard on their shrines. |
Gabby made two amazing and adorable shrines.
I love it.
Carye made a simple and adorable shrine of an elephant that she is going to give to her sweetie.
And I made three shrines that will become a larger project involving a large diorama or shrine dedicated to my walk across Spain this past summer, aka the Camino de Santiago de Compostela, which I met Judy on by the way, and it turned out she only lives approximately 10 blocks away from me. I had not met her before the Camino I should add.
 |
| I made copies of the stamps from my Pilgrim passport. |
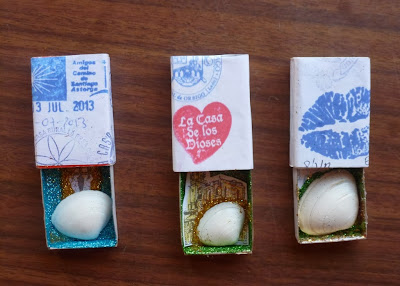 |
| I collected these shells off the beach at Finisterre. |
Wednesday, October 30, 2013
Halloween Costume 2013
Pin It Now!
I went to a clothing exchange a couple of months ago where I found the perfect dress for this costume. In fact, I wasn't even going to dress as this person, but when I came upon the dress, I couldn't not be this person.
Also this summer I was on a super sweet scavenger hunt and our team name was the Knotty Nauticals. We got amazingly dressed up. In fact, I won best individual costume and our team won best overall theme. We won the scavenger hunt, which was pretty sweet because they had amazing prizes.
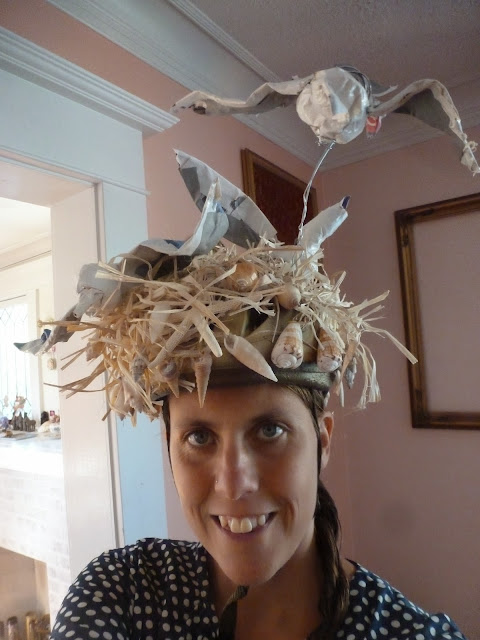
Why am I telling you all of this? Well, here's my costume and check out my helmet. I felt like this was a precursor to what I would be for Halloween:
Have you guessed it yet? Yes, I was Tippi Hedren from The Birds. Sorry if the clues were a bit abstract. I had this hoop that my mom gave me. She used it for her baton twirling troupe, and I attached all of the little crows and a couple of the seagulls from my helmet to it for a pretty sweet prop. Of course I put a crow in my wig as well.
Here's the results:
I just wanted to wish everyone a Happy Halloween!!!
Hearts,
Bece
Monday, October 21, 2013
Terrariums and Outdoor Plants
Pin It Now!
I have been going terrarium crazy. I have been trying to get as many done in the warm sun as possible because it's easier to clean up the mess that way.
Here's my latest:
I also spruced up my plants outside a bit. I am really into the old shoe or boot planter.
I have been going terrarium crazy. I have been trying to get as many done in the warm sun as possible because it's easier to clean up the mess that way.
Here's my latest:
I also spruced up my plants outside a bit. I am really into the old shoe or boot planter.
Saturday, September 28, 2013
Final Art Car Additions for 2013
Pin It Now!
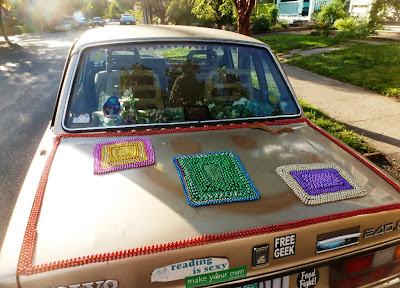
On Thursday I had a great urge to work on my car. It was a beautiful fall day and looking at the forecast I knew this weather was short lived. I decided that I needed to start bedazzling the trunk of the car to balance things out. Here's the outcome so far:
It was the perfect weather. It was sunny, but not too warm. I have never affixed beads to my car without losing a pound in sweat, so that was quite delightful.
I was correct about the weather, however. Friday it started to rain and there have been all sorts of rain storm warnings since. Literally the it's like a monsoon outside right now as I am typing this.
Looks like I can put this project to rest till the sun returns in 2014!
Thursday, September 19, 2013
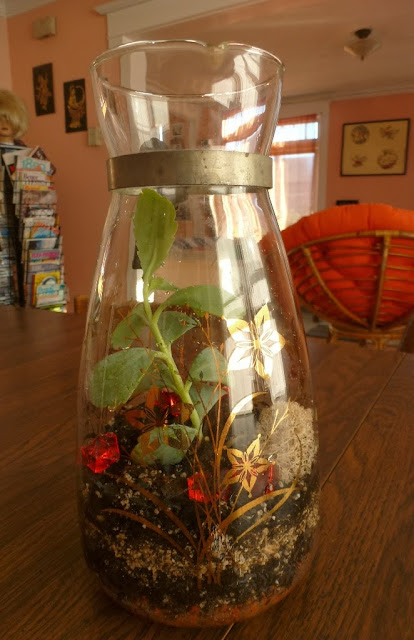
DIY Coffee Urn Terrarium
Pin It Now!
I am really excited about my latest project. I have been collecting glass vases from free boxes for a couple of years now with the intent of making a terrarium, but for some reason felt a bit intimidated about making one.
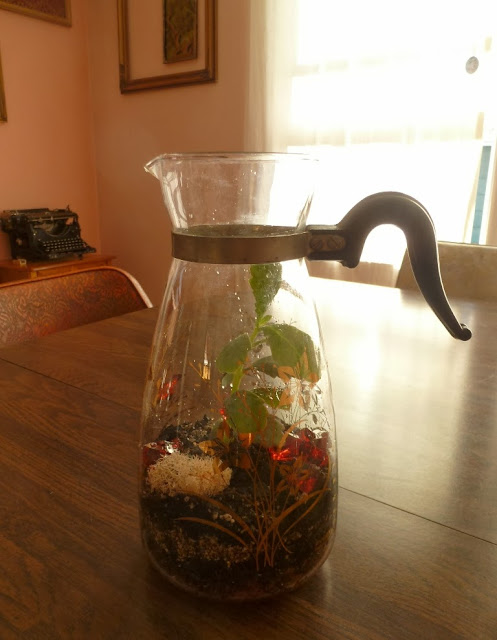
Two days ago I decided now was the time. I found a simple DIY terrarium instruction website and while doing some internet research I came upon a terrarium that was made in a vintage coffee urn. It looked awesome. I actually had a coffee urn in my vintage spot at Red Fox and it was settled that that was what I was going to do.
To make things even more serendipitous I found two coffee urns thrift shopping yesterday. After I purchased them, I headed straight to Portland Nursery to pick up some terrarium supplies.
Things you definitely need for making a terrarium are:
Activated Charcoal
Potting soil or Succulent soil if that's what you are using
Rocks
Moss and decorative items are optional, but I think add a bit more whimsy to the little universe you are creating.
I needed to use chopsticks to place the plants and moss and rocks since the neck of the coffee urns were so slender. If you use a large bowl or vase, you won't need chopsticks.
Here's a photo of the two I made yesterday and are currently for sale at Red Fox on SE 46th and Woodstock:
Here's how you can make your own terrarium:
1. Choose a glass jar, vase or whatever clear container you would like; sky's the limit.
2. Add a layer of rocks. This is to help drain excess water.
3. Mix potting soil together. Follow the ratios on the bag of activated charcoal you buy. The charcoal prevents your terrarium from becoming waterlogged. If you don't have succulent soil, I think it's okay to use potting soil and activated charcoal and be careful on how often you water it.
4. Put soil in the container on the rocks. Add whatever plants you would like. It's best to get a plant that is small enough or fits the container.
5. Add moss and decorative items.
6. Enjoy your lovely new terrarium! Makes a perfect centerpiece on your dinner table.
Tuesday, August 20, 2013
Car Decor 2013
Pin It Now!
I am finally back at it. Why the late start? Well, I spent the first 6 weeks of summer in Spain and then I went on the sweet canoeing trip among other fun summertime events. I borrowed a friend's canoe and my car hauled a canoe on the roof for the first time ever. I didn't think it would be possible, but here's the proof (and a couple of extra photos of the canoeing fun).
So I washed the dust off my car this Sunday and today was the day to get started on my second summer of decorating. As you might be able to tell from the canoe photo, the sun has seriously bleached out the color of the beads and the words on the side are pretty much gone. I do like the rusted antique look of the beads, but I haven't quite decided if I will add words again with a more permanent pen or maybe just add beads.
Here's what I accomplished today:
I got lots of compliments while I was affixing beads. To be continued...
Subscribe to:
Comments (Atom)


