Pin It Now!
I went to a clothing exchange a couple of months ago where I found the perfect dress for this costume. In fact, I wasn't even going to dress as this person, but when I came upon the dress, I couldn't not be this person.
Also this summer I was on a super sweet scavenger hunt and our team name was the Knotty Nauticals. We got amazingly dressed up. In fact, I won best individual costume and our team won best overall theme. We won the scavenger hunt, which was pretty sweet because they had amazing prizes.
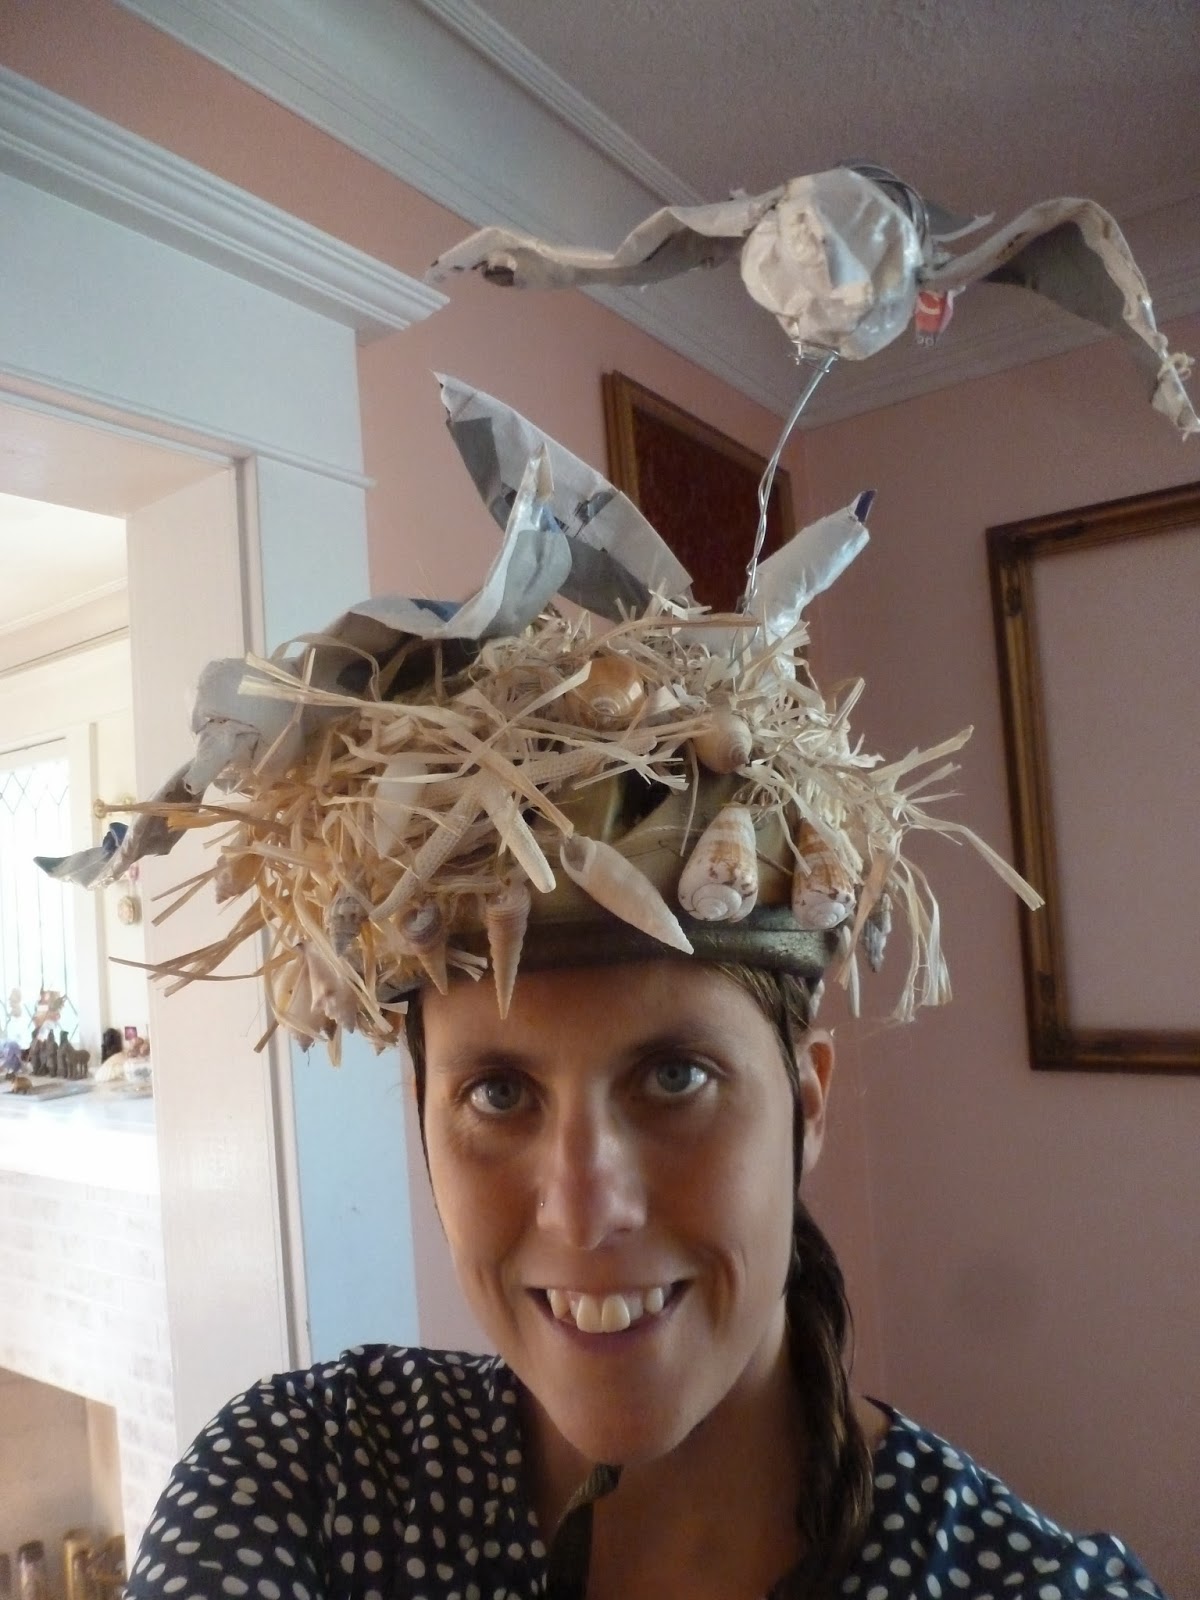
Why am I telling you all of this? Well, here's my costume and check out my helmet. I felt like this was a precursor to what I would be for Halloween:
Have you guessed it yet? Yes, I was Tippi Hedren from The Birds. Sorry if the clues were a bit abstract. I had this hoop that my mom gave me. She used it for her baton twirling troupe, and I attached all of the little crows and a couple of the seagulls from my helmet to it for a pretty sweet prop. Of course I put a crow in my wig as well.
Here's the results:
I just wanted to wish everyone a Happy Halloween!!!
Hearts,
Bece
Wednesday, October 30, 2013
Monday, October 21, 2013
Terrariums and Outdoor Plants
Pin It Now!
I have been going terrarium crazy. I have been trying to get as many done in the warm sun as possible because it's easier to clean up the mess that way.
Here's my latest:
I also spruced up my plants outside a bit. I am really into the old shoe or boot planter.
I have been going terrarium crazy. I have been trying to get as many done in the warm sun as possible because it's easier to clean up the mess that way.
Here's my latest:
I also spruced up my plants outside a bit. I am really into the old shoe or boot planter.
Saturday, September 28, 2013
Final Art Car Additions for 2013
Pin It Now!
On Thursday I had a great urge to work on my car. It was a beautiful fall day and looking at the forecast I knew this weather was short lived. I decided that I needed to start bedazzling the trunk of the car to balance things out. Here's the outcome so far:
It was the perfect weather. It was sunny, but not too warm. I have never affixed beads to my car without losing a pound in sweat, so that was quite delightful.
I was correct about the weather, however. Friday it started to rain and there have been all sorts of rain storm warnings since. Literally the it's like a monsoon outside right now as I am typing this.
Looks like I can put this project to rest till the sun returns in 2014!
On Thursday I had a great urge to work on my car. It was a beautiful fall day and looking at the forecast I knew this weather was short lived. I decided that I needed to start bedazzling the trunk of the car to balance things out. Here's the outcome so far:
It was the perfect weather. It was sunny, but not too warm. I have never affixed beads to my car without losing a pound in sweat, so that was quite delightful.
I was correct about the weather, however. Friday it started to rain and there have been all sorts of rain storm warnings since. Literally the it's like a monsoon outside right now as I am typing this.
Looks like I can put this project to rest till the sun returns in 2014!
Thursday, September 19, 2013
DIY Coffee Urn Terrarium
Pin It Now!
I am really excited about my latest project. I have been collecting glass vases from free boxes for a couple of years now with the intent of making a terrarium, but for some reason felt a bit intimidated about making one.
Two days ago I decided now was the time. I found a simple DIY terrarium instruction website and while doing some internet research I came upon a terrarium that was made in a vintage coffee urn. It looked awesome. I actually had a coffee urn in my vintage spot at Red Fox and it was settled that that was what I was going to do.
To make things even more serendipitous I found two coffee urns thrift shopping yesterday. After I purchased them, I headed straight to Portland Nursery to pick up some terrarium supplies.
Things you definitely need for making a terrarium are:
Activated Charcoal
Potting soil or Succulent soil if that's what you are using
Rocks
Moss and decorative items are optional, but I think add a bit more whimsy to the little universe you are creating.
I needed to use chopsticks to place the plants and moss and rocks since the neck of the coffee urns were so slender. If you use a large bowl or vase, you won't need chopsticks.
Here's a photo of the two I made yesterday and are currently for sale at Red Fox on SE 46th and Woodstock:
Here's how you can make your own terrarium:
1. Choose a glass jar, vase or whatever clear container you would like; sky's the limit.
2. Add a layer of rocks. This is to help drain excess water.
3. Mix potting soil together. Follow the ratios on the bag of activated charcoal you buy. The charcoal prevents your terrarium from becoming waterlogged. If you don't have succulent soil, I think it's okay to use potting soil and activated charcoal and be careful on how often you water it.
4. Put soil in the container on the rocks. Add whatever plants you would like. It's best to get a plant that is small enough or fits the container.
5. Add moss and decorative items.
6. Enjoy your lovely new terrarium! Makes a perfect centerpiece on your dinner table.
I am really excited about my latest project. I have been collecting glass vases from free boxes for a couple of years now with the intent of making a terrarium, but for some reason felt a bit intimidated about making one.
Two days ago I decided now was the time. I found a simple DIY terrarium instruction website and while doing some internet research I came upon a terrarium that was made in a vintage coffee urn. It looked awesome. I actually had a coffee urn in my vintage spot at Red Fox and it was settled that that was what I was going to do.
To make things even more serendipitous I found two coffee urns thrift shopping yesterday. After I purchased them, I headed straight to Portland Nursery to pick up some terrarium supplies.
Things you definitely need for making a terrarium are:
Activated Charcoal
Potting soil or Succulent soil if that's what you are using
Rocks
Moss and decorative items are optional, but I think add a bit more whimsy to the little universe you are creating.
I needed to use chopsticks to place the plants and moss and rocks since the neck of the coffee urns were so slender. If you use a large bowl or vase, you won't need chopsticks.
Here's a photo of the two I made yesterday and are currently for sale at Red Fox on SE 46th and Woodstock:
Here's how you can make your own terrarium:
1. Choose a glass jar, vase or whatever clear container you would like; sky's the limit.
2. Add a layer of rocks. This is to help drain excess water.
3. Mix potting soil together. Follow the ratios on the bag of activated charcoal you buy. The charcoal prevents your terrarium from becoming waterlogged. If you don't have succulent soil, I think it's okay to use potting soil and activated charcoal and be careful on how often you water it.
4. Put soil in the container on the rocks. Add whatever plants you would like. It's best to get a plant that is small enough or fits the container.
5. Add moss and decorative items.
6. Enjoy your lovely new terrarium! Makes a perfect centerpiece on your dinner table.
Tuesday, August 20, 2013
Car Decor 2013
Pin It Now!
I am finally back at it. Why the late start? Well, I spent the first 6 weeks of summer in Spain and then I went on the sweet canoeing trip among other fun summertime events. I borrowed a friend's canoe and my car hauled a canoe on the roof for the first time ever. I didn't think it would be possible, but here's the proof (and a couple of extra photos of the canoeing fun).
So I washed the dust off my car this Sunday and today was the day to get started on my second summer of decorating. As you might be able to tell from the canoe photo, the sun has seriously bleached out the color of the beads and the words on the side are pretty much gone. I do like the rusted antique look of the beads, but I haven't quite decided if I will add words again with a more permanent pen or maybe just add beads.
Here's what I accomplished today:
I got lots of compliments while I was affixing beads. To be continued...
I am finally back at it. Why the late start? Well, I spent the first 6 weeks of summer in Spain and then I went on the sweet canoeing trip among other fun summertime events. I borrowed a friend's canoe and my car hauled a canoe on the roof for the first time ever. I didn't think it would be possible, but here's the proof (and a couple of extra photos of the canoeing fun).
So I washed the dust off my car this Sunday and today was the day to get started on my second summer of decorating. As you might be able to tell from the canoe photo, the sun has seriously bleached out the color of the beads and the words on the side are pretty much gone. I do like the rusted antique look of the beads, but I haven't quite decided if I will add words again with a more permanent pen or maybe just add beads.
Here's what I accomplished today:
I got lots of compliments while I was affixing beads. To be continued...
Monday, August 12, 2013
DIY Crafts in Spain
Pin It Now!
Pardon the dust, but I spent six weeks in Spain the beginning of this summer walking the Camino de Santiago de Compostela. Just as an FYI, Santiago means Saint James, so this pilgrimage is literally called The Way of Saint James. You can look it up for more history if you want.
I walked with my friend Sarah who spoke excellent Spanish since she had been living there for two years. It took us 33 days to go nearly 500 miles and it was a mentally and physically challenging, yet an extremely wonderful experience.
Here are some of the reuse diy crafts I came upon along The Way.
First, during the summer of 2012, Sarah spent the summer at home and she made a backpack rain cover with fused plastic bags. Here's the result. I think it's super cool:
In Pamplona, which is a pretty neat city, we came upon this decorated bicycle:
Along The Way we came upon these flags that stated how much garbage a person creates in a day, super cool:
One of the hospitalarios showed us all of his artwork, which was pretty amazing, but I also noticed he was wearing this sweet fanny pack. It turned out he made it in '89, wow, original hipster!
We also saw some very cool and interesting iron work done on somebody's fence for their house:
We stayed at an albergue that had a lot of artwork done by the hospitalarios and they had a very interesting way to decorate their hanging pots:
They also used a some really cool large old cans for planters, which I really liked, but did not take a photo of.
There were many crosses along The Way, but this one was exceptionally cool and somebody had made a peregrino (pilgrim) sculpture, which was kind of funny.
We were on a hill leaving a pueblo when we spotted a map of the world in the distance. I have no idea what it was made out of, maybe rocks? maybe bushes?
Pardon the dust, but I spent six weeks in Spain the beginning of this summer walking the Camino de Santiago de Compostela. Just as an FYI, Santiago means Saint James, so this pilgrimage is literally called The Way of Saint James. You can look it up for more history if you want.
I walked with my friend Sarah who spoke excellent Spanish since she had been living there for two years. It took us 33 days to go nearly 500 miles and it was a mentally and physically challenging, yet an extremely wonderful experience.
Here are some of the reuse diy crafts I came upon along The Way.
First, during the summer of 2012, Sarah spent the summer at home and she made a backpack rain cover with fused plastic bags. Here's the result. I think it's super cool:
In Pamplona, which is a pretty neat city, we came upon this decorated bicycle:
| photo by Sarah |
| 1.3 kgs of garbage a day |
| Paco lived in France for a while. |
| Paco and Sarah goofing off. |
| three iron work photos by Sarah |
They also used a some really cool large old cans for planters, which I really liked, but did not take a photo of.
There were many crosses along The Way, but this one was exceptionally cool and somebody had made a peregrino (pilgrim) sculpture, which was kind of funny.
| photo by Sarah |
| photo by Sarah |
| photo by Sarah |
I would like to mention that there's a very DIY Spanish method to lancing blisters on your feet by threading thread into them and leaving it there so you can "floss" your blister a few times a day. That way the blister doesn't refill with fluid while you are walking and it's much more comfortable. Of course, you want to make sure to sterilize everything with iodine and then use an antibacterial while flossing the blister. I was blister free until week three when I had to do this. I took a photo of it, but I will spare you even though I find it fascinating.
So we made it to Santiago. Here's a photo of us as we arrived at the Santiago Cathedral:
We spent a night in Santiago, went to the Pilgrim's Mass where we saw a 175 pound incensario swing above our heads, super cool. It was meant to fumigate the flea ridden pilgrims of yore. We then caught the bus to Finisterre because we didn't have time to walk. Finisterre means the end of the earth, which it was to the Spanish before Columbus set sail.
I also learned that this pilgrimage was pre-Christian. The pagans use to make a pilgrimage to the Atlantic, jump in and burn their clothes and they were born again. That's just what I did. We spent the day on this gorgeous wild beach and I jumped in the Atlantic. That night we walked up to the lighthouse, watched the sunset where I burnt my hat and Sarah burnt her boots because they were done for:
| 0 kms to go |
We had a great time. We saw a lot of amazing things, but you are definitely getting a different, very diy view of the Camino. I hope you enjoyed it~
Buen Camino
Thursday, June 6, 2013
1960s Wallpaper Light Switch Covers
Pin It Now!
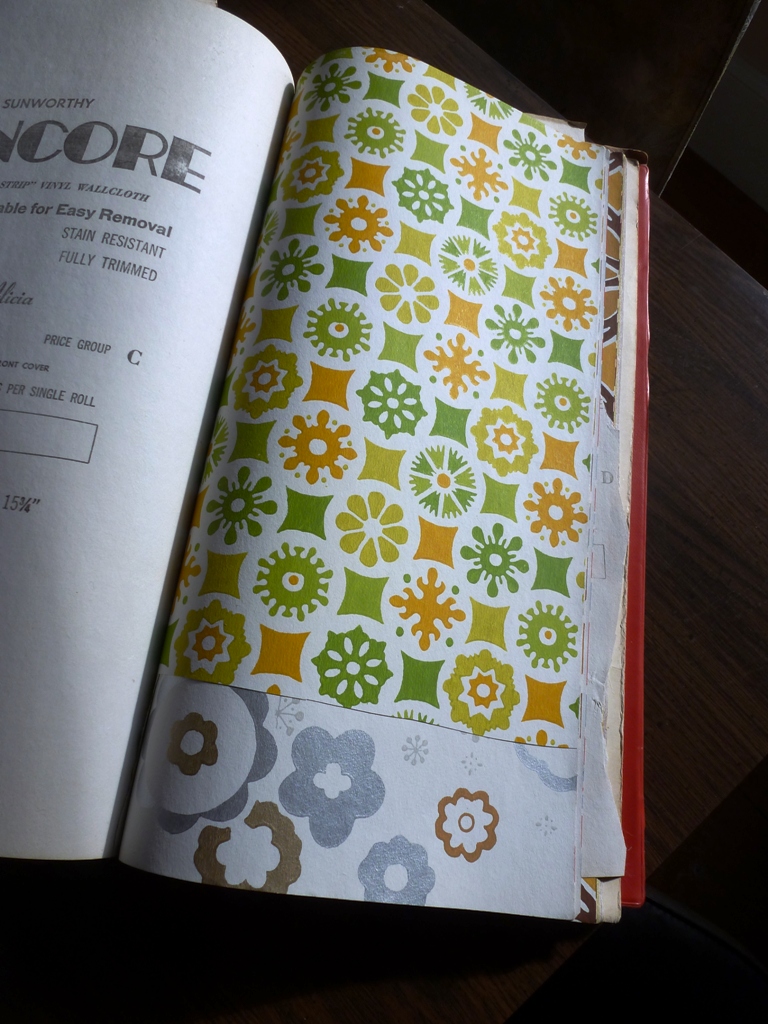
Yes, I do make a lot of light switch covers, but they are a hot seller at SCRAP's ReBoutique. Brandon recently went to Chicago for his mom's 70th birthday and came across these two wallpaper books in her attic and he brought them home to me. The are amazing! I really love the 1960s patterns. The Patrician ones will be handing, too, and I will probably embellish them a bit since that's my style.
Enjoy~
Oh, and I am off to Spain tomorrow to walk the Camino de Santiago, so you won't see another post from me till the end of July. Have a nice summer!
Yes, I do make a lot of light switch covers, but they are a hot seller at SCRAP's ReBoutique. Brandon recently went to Chicago for his mom's 70th birthday and came across these two wallpaper books in her attic and he brought them home to me. The are amazing! I really love the 1960s patterns. The Patrician ones will be handing, too, and I will probably embellish them a bit since that's my style.
Enjoy~
Oh, and I am off to Spain tomorrow to walk the Camino de Santiago, so you won't see another post from me till the end of July. Have a nice summer!
Subscribe to:
Posts (Atom)