Pin It Now!
Last weekend when Portland was experiencing such beautiful weather, Keri Piehl and myself got together for another round of marbling. Now that I knew what images marbled well, I wanted another shot at it.
It was a beautiful day so we were out in the driveway enjoying the sunshine and a bit of wind, which made for some interesting natural marbling at times. The wind eventually died down and it was just lovely.
I remembered my camera this time so I took photos during the various stages of the marbling process. Here is a picture of the marbling setup. These were inks that Keri had procured from a free box, which piqued her interest in marbling in the first place. Since she then she had bought better quality inks from SCRAP and we realized these were not as good:
If you click on my Free Box the Magazine blog, you can see the saga of these inks.
As you may notice Keri made her own combs with rulers or frame pieces and attached straight pins to them.
First, you need to decide what you want to marble and the sky is pretty much the limit.
Second, you need to prep your paper with an agar solution so that the ink doesn't slide off the paper when you rinse it off. Some inks and paper don't need this prepping, but I can't tell you anymore about that.
 |
| Keri prepping her papers. |
 |
| Before shot of a 1958 newspaper ad I am planning to marble. |
 |
| Another 1958 ad, I am really into vintage images. |
Next you drop in the colors you want to use into some sort of seaweed solution. This is what the ink settles on and what you use for marbling. Since I use all of Keri's materials, I don't really have any details on this. If you want more info, I am sure there are plenty of internet tutorials for you and, of course, lots of books. I'm just giving you a general sketch.
 |
| I am going to make a flower pattern in this one. |
After the you have a good amount of ink on the seaweed solution, you then run your combs through. This is what "marbles" the paper or whatever you are marbling. You can experiment with various styles and designs.
You then lay the paper on top and tap it a bit to get any air bubbles out. You slide the paper off along one end and you then rinse the paper to pull off any ink.
After that you hang it up to dry. We used a clothes or sock drier for this purpose.
When it is dry, you are done and you have some beautiful marbled paper for wrapping or display, envelope making, whatever you want.
 |
| I also did some smaller ones for covering light switch plates. |
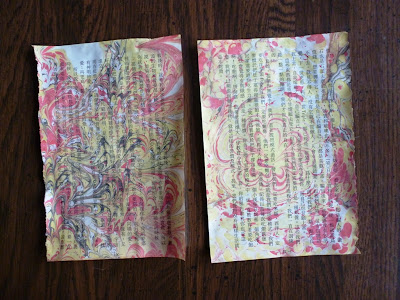
These were really cool. They came from a book that was falling apart that I found in a free box. I love the images of the various chess moves. I am going to use them for light switch covers as well. More info and images of the book on my free box blog.
Happy Marbling!


